Any ride-hailing company that wants to boost customer and driver loyalty should be attentive and responsive to their feedback.
It is essential for a company to track its customer and driver feedback so that it can:
1. detect any bottlenecks in service provision
2. promptly react and troubleshoot any customer-driver issues
3. manage a user’s feedback on an individual basis
4. increase customer and driver satisfaction and retention
5. increase operations quality and efficiency
There are 5 events that trigger feedback registration:
1. A customer leaves feedback via the app > side menu > “App feedback”
2. A customer rates a driver 3 or lower after an order.
3. A driver leaves feedback via the app > side menu > “App feedback”
4. A driver rates a customer 3 or lower after an order
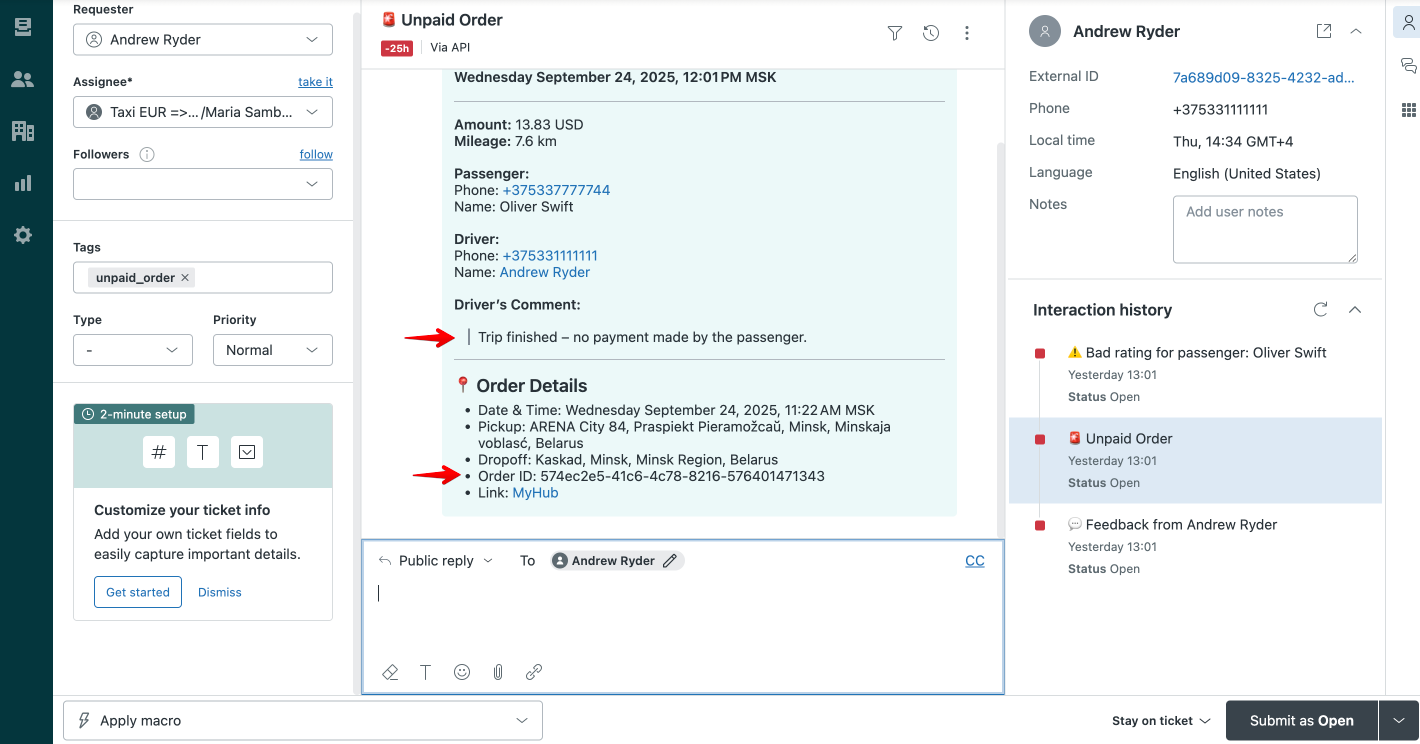
5. A driver reports a cash/terminal order as unpaid
An integration with Zendesk allows a company to collect all customer and driver feedback in one space - their personal Zendesk account.
NB: "App feedback” tab in Customer and Driver apps is not available by default. In case a company wants their customers and drivers to send feedback to Zendesk, it should submit a request to [email protected]
1. Open zendesk.com and select “Try for free”.
Create an account as per the account registration steps from Zendesk.
Select the tariff plan with Zendesk to continue using the account once a 14-day trial is over.
2. Check and copy your account subdomain, registered in Zendesk as you will need it to activate the integration with Onde (subdomain is also a part of Zendesk account URL).
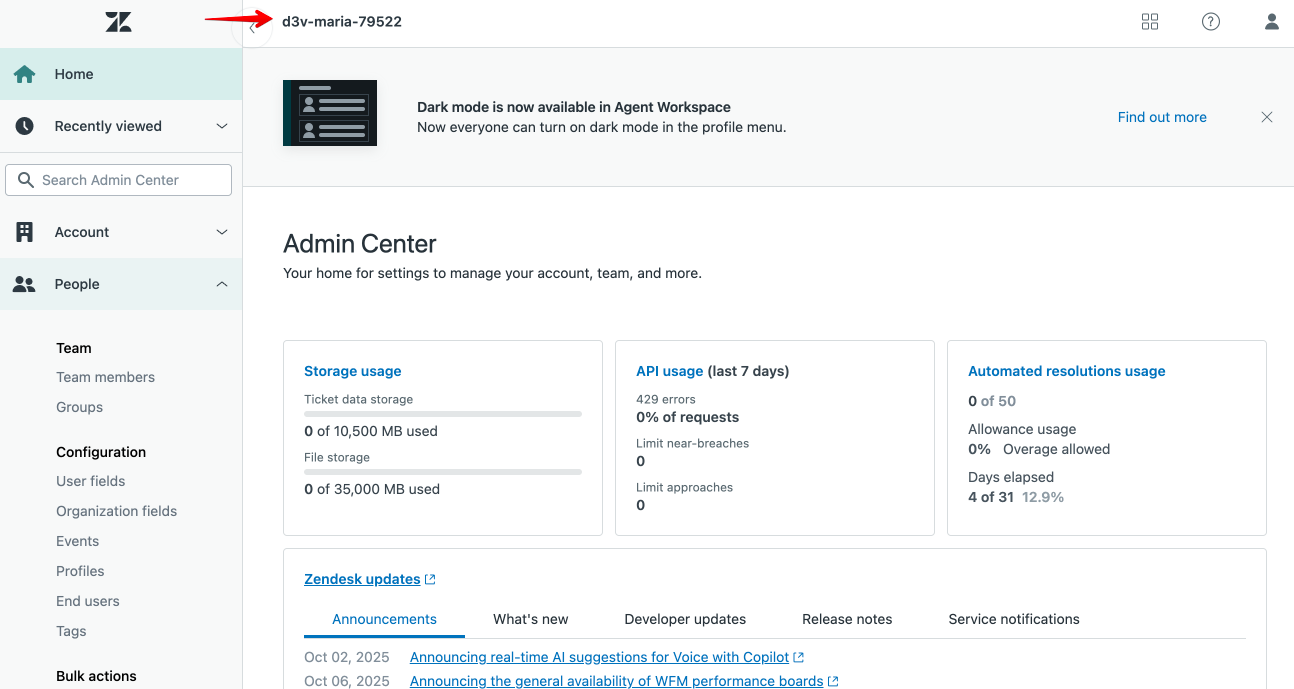
3. Save the URL of your Zendesk account for easy access.
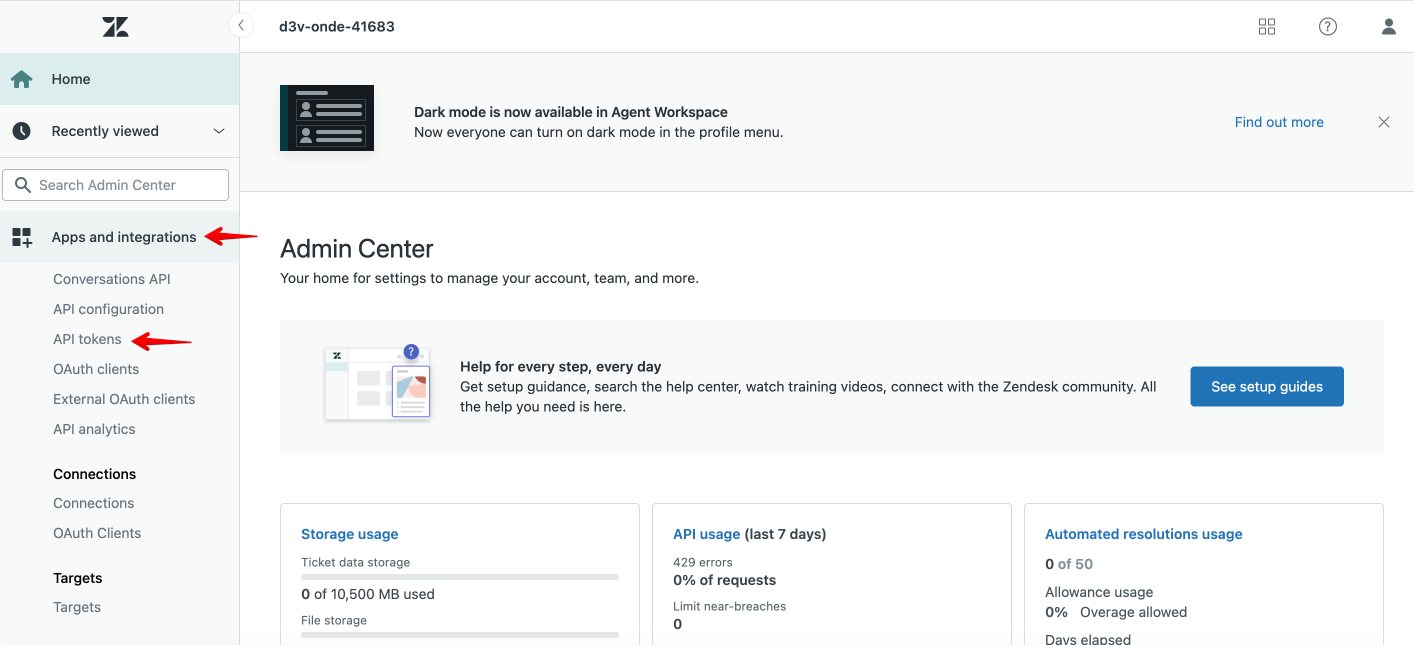
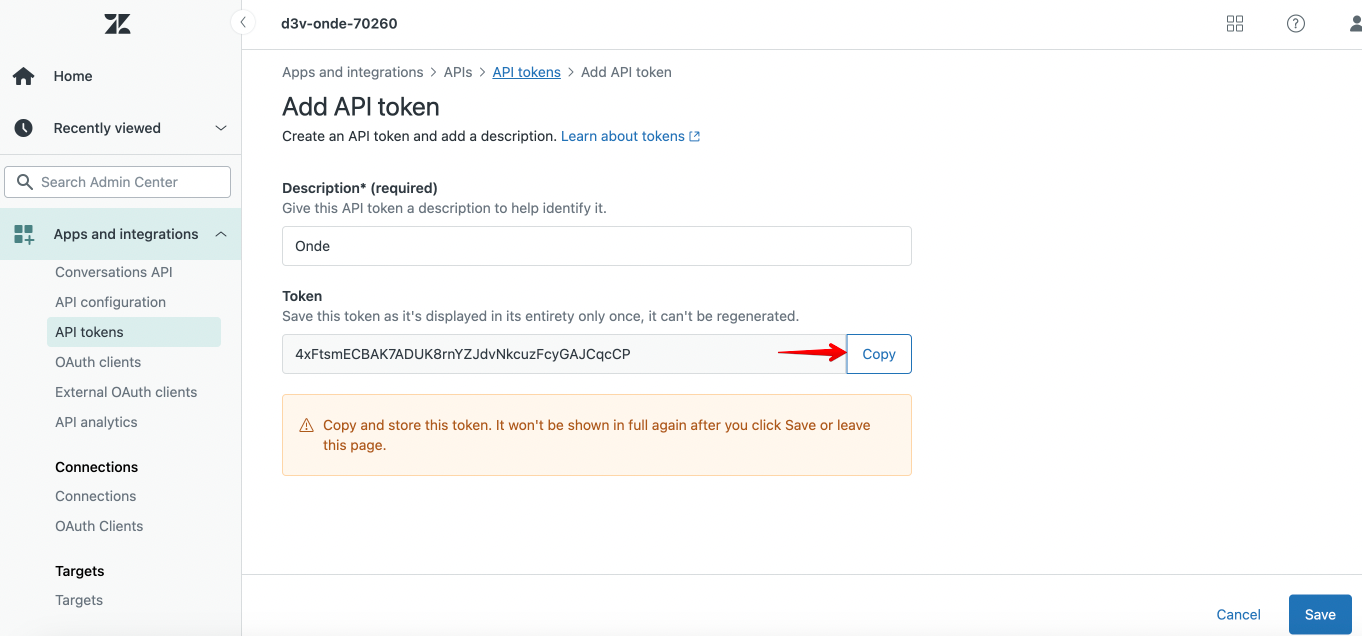
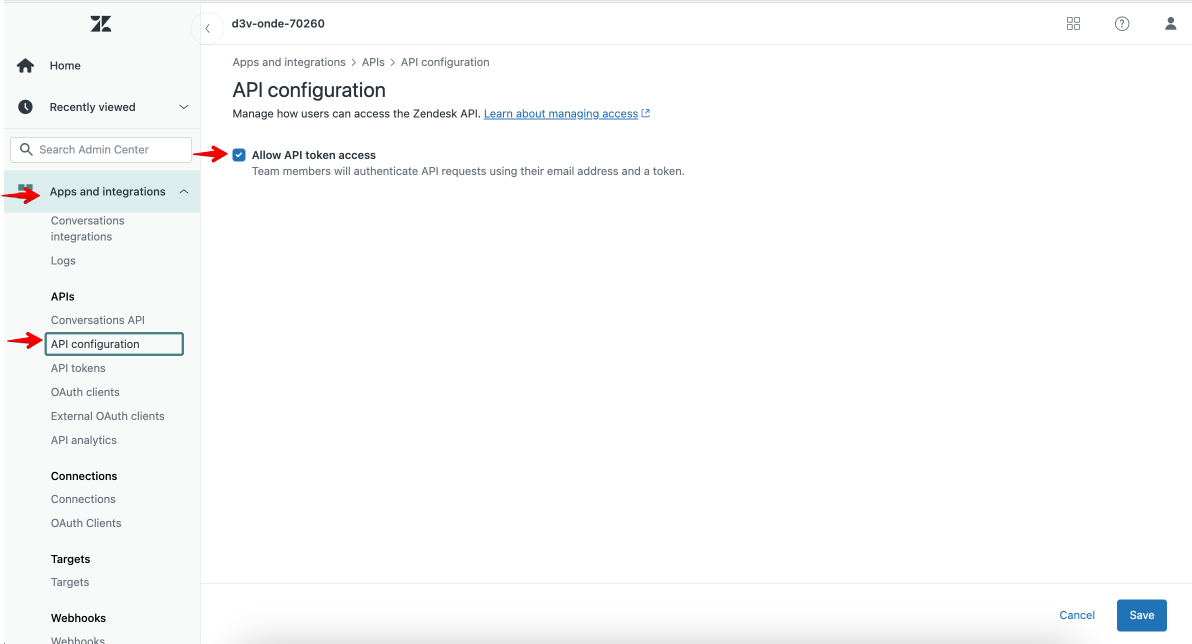
4. Proceed to Settings > Apps and integrations > API tokens > Add API token > add any token description and tap “Save” for the token to get auto-generated > tap COPY and save the token. This token will be added to the API configuration when you activate the integration with Onde.

5. Proceed to API configuration > enable checkbox “Allow API token access”.
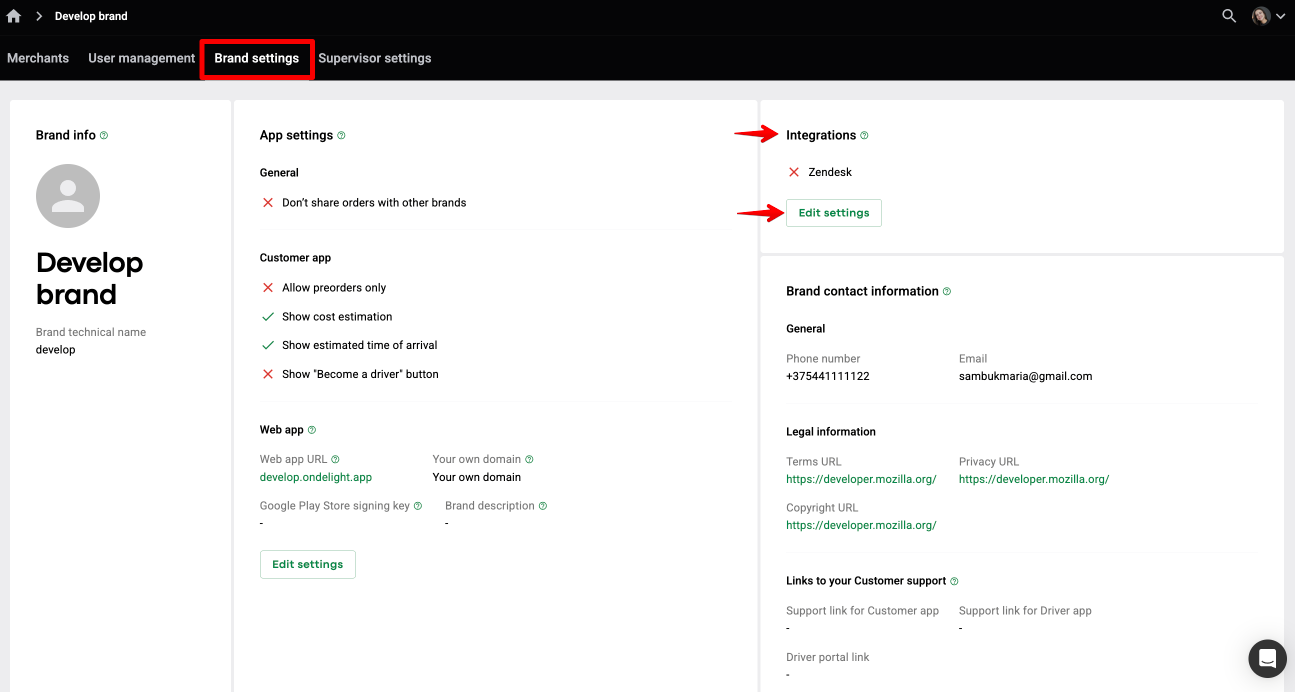
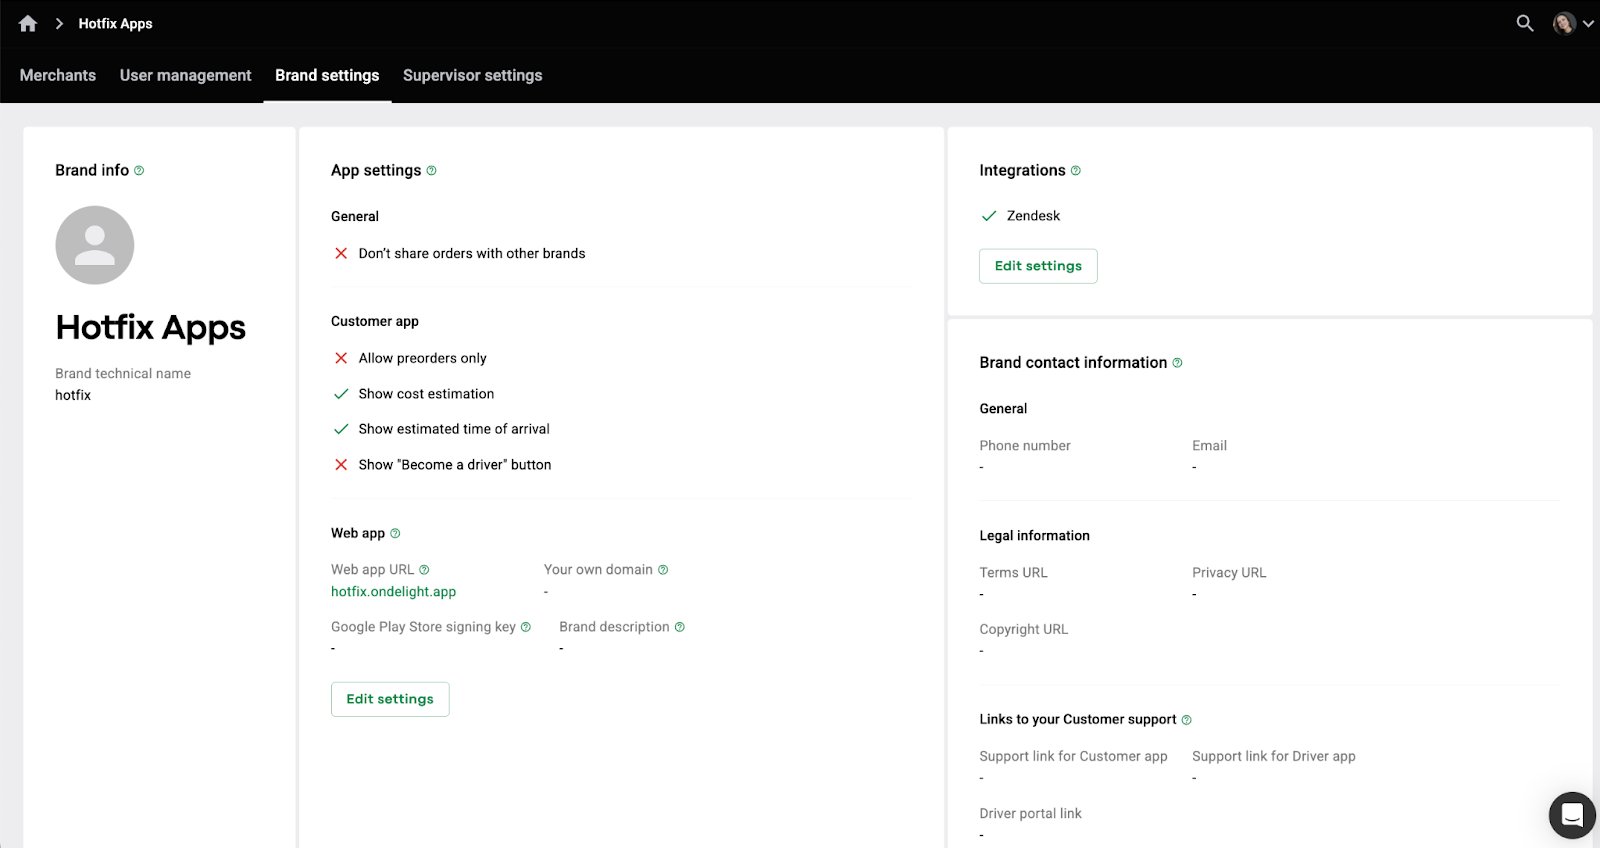
1. To enable the integration with Zendesk, proceed to Brands > Brand settings > find Integrations > tap “Edit settings”.
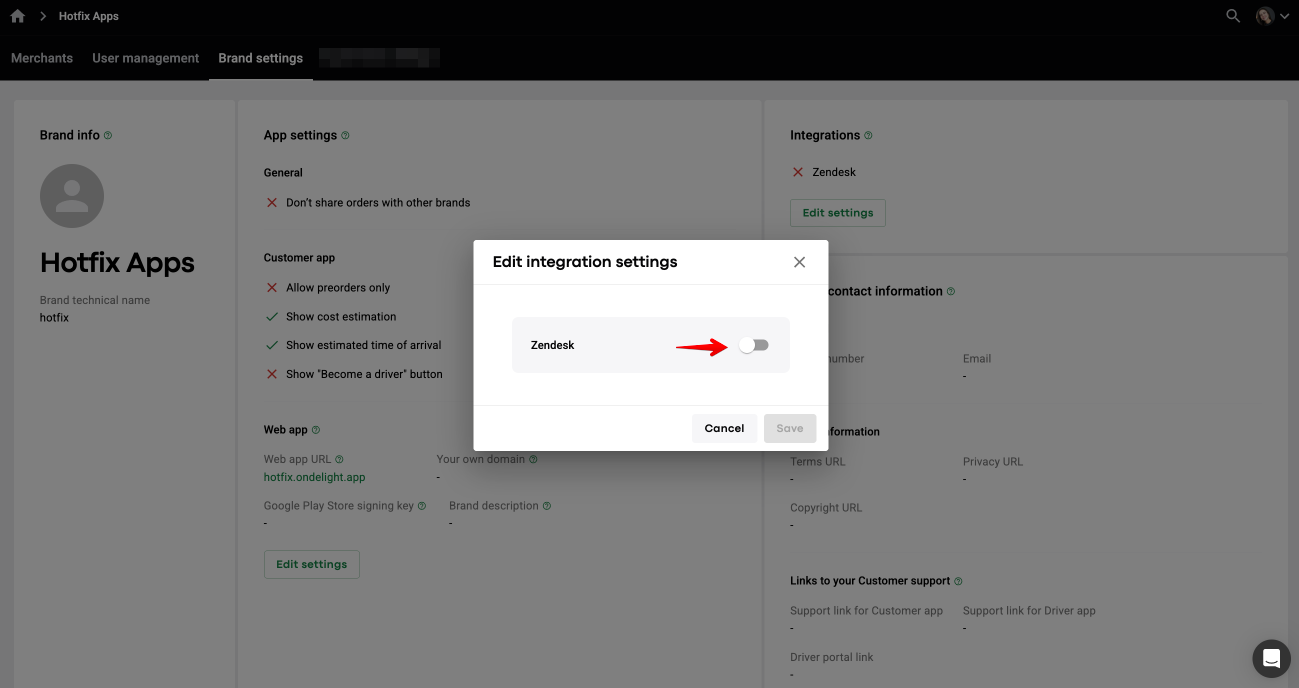
2. Switch the toggle on for Zendesk and tap “Save”.
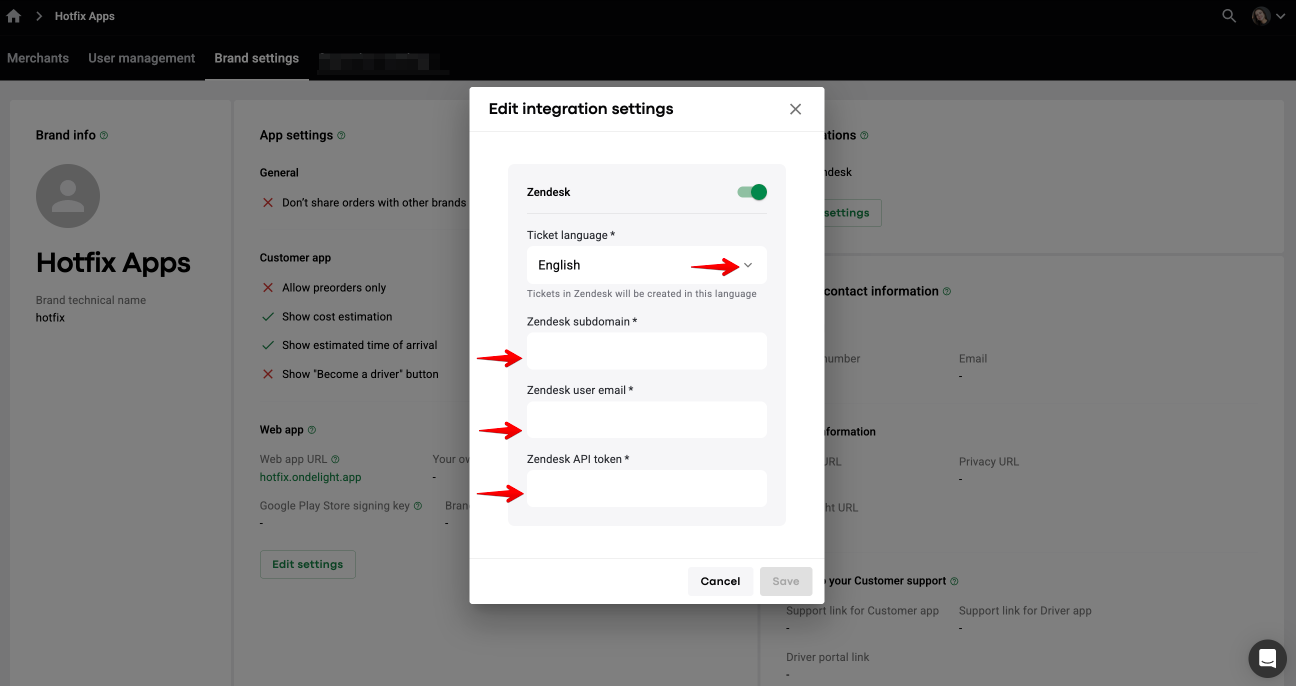
3. On the pop-up screen, fill out the form with the following fields:
Ticket language:
This is a Customer feedback ticket language. It is set as English by default. The company’s Service language will be the ticket language for the other 4 events.
You can change the ticket language for Customer feedback to any other language from the dropdown list.
Zendesk subdomain:
Displayed in the top right corner of a Zendesk account (also a part of Zendesk account URL).
Zendesk user email
The email used to register the Zendesk account.
Zendesk API token:
Add the API token you generated in API configuration.
Note that the API token can be regenerated in the API configuration and re-added to the Zendesk integration settings at any time.
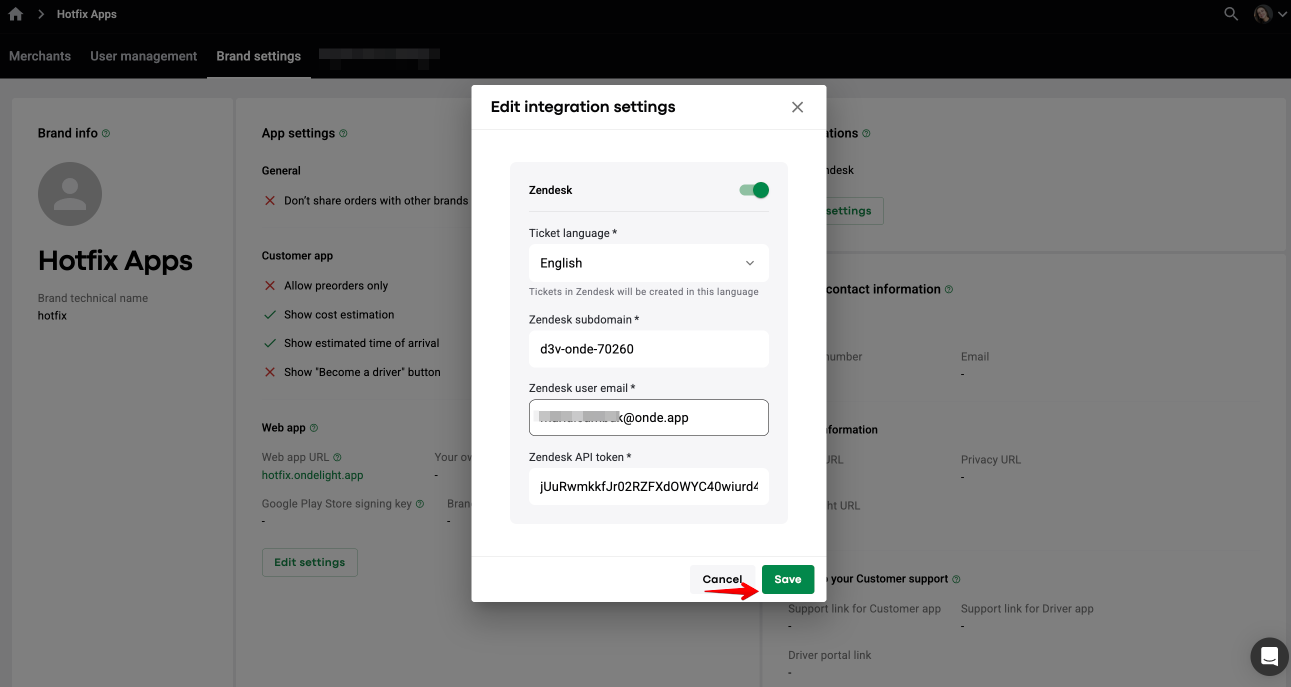
Mind that if your Zendesk account is deactivated, you can always create a new one and update the integration with the new account data.
Once Zendesk integration is on, Groups are generated in one’s Zendesk account.
Group corresponds to 1 company in the Brand.
An account is created with as many groups as there are active companies in a Brand.
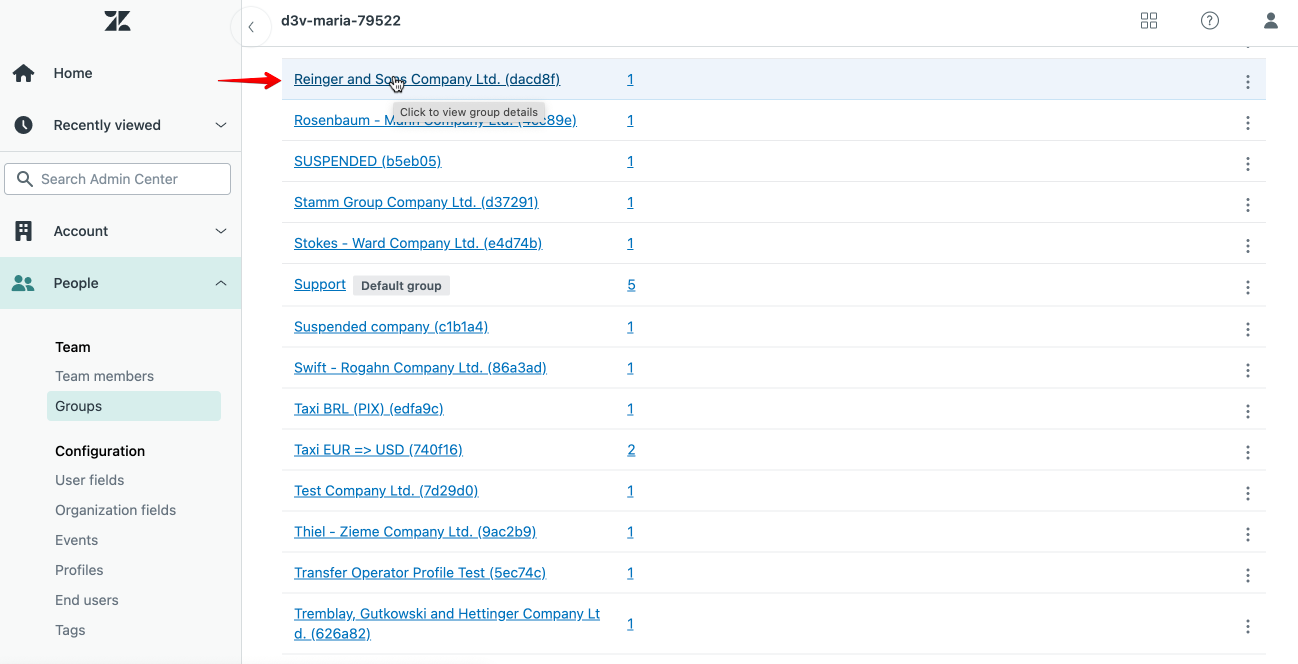
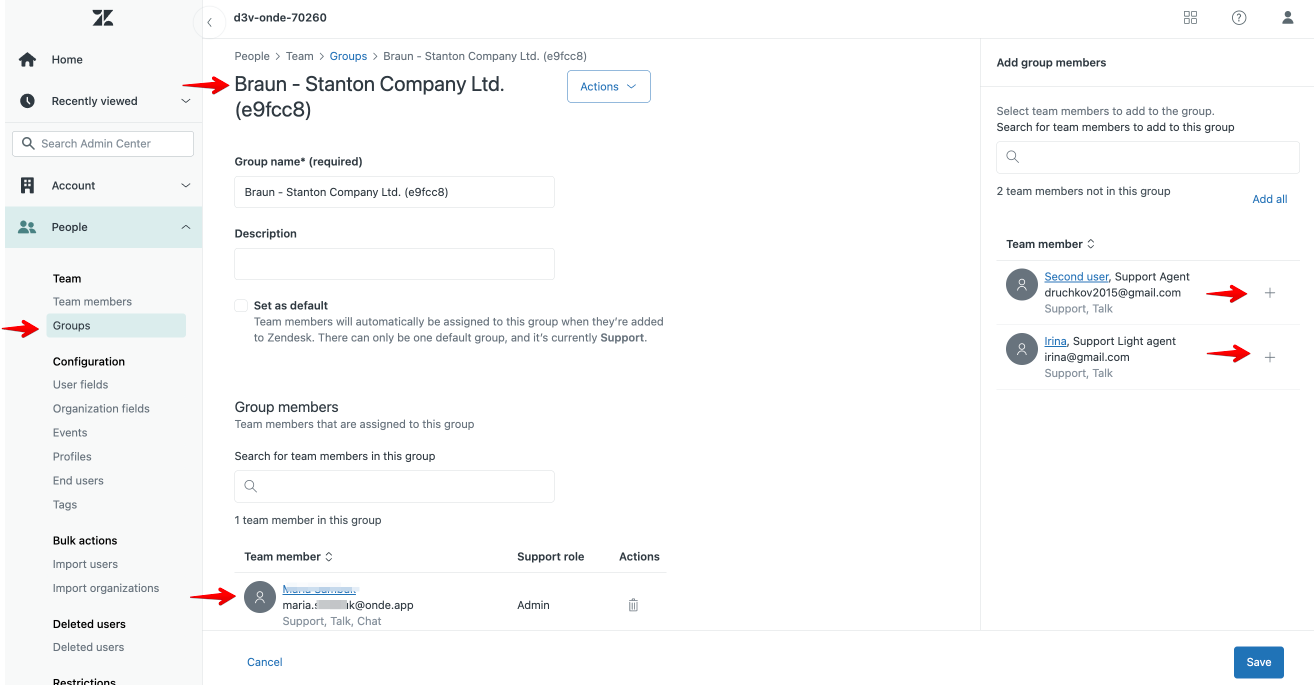
To review Groups in the account, proceed to Settings > People > Groups.
If a new company is added to the Brand, a new Group is created.
If an active company is suspended, the Group still remains in the Zendesk account, but you can delete it manually. If a suspended company is activated, a new group is created for it in Zendesk.
Group name is Company name + 6 last digits of one’s company ID with Onde (from My hub URL)
For example, “Boehm Group Company Ltd. (a134f6)” Group: Boehm Group Company Ltd. - company name, a134f6 - last 6 digits of My hub URL.
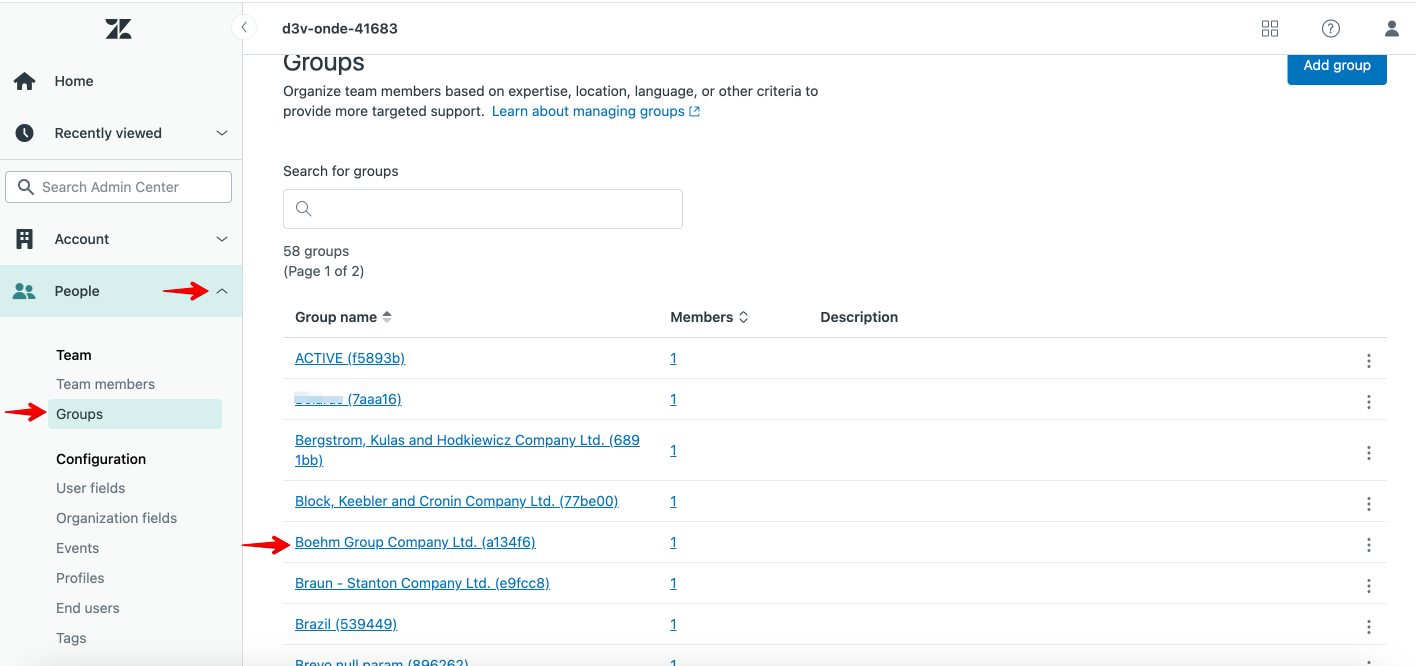
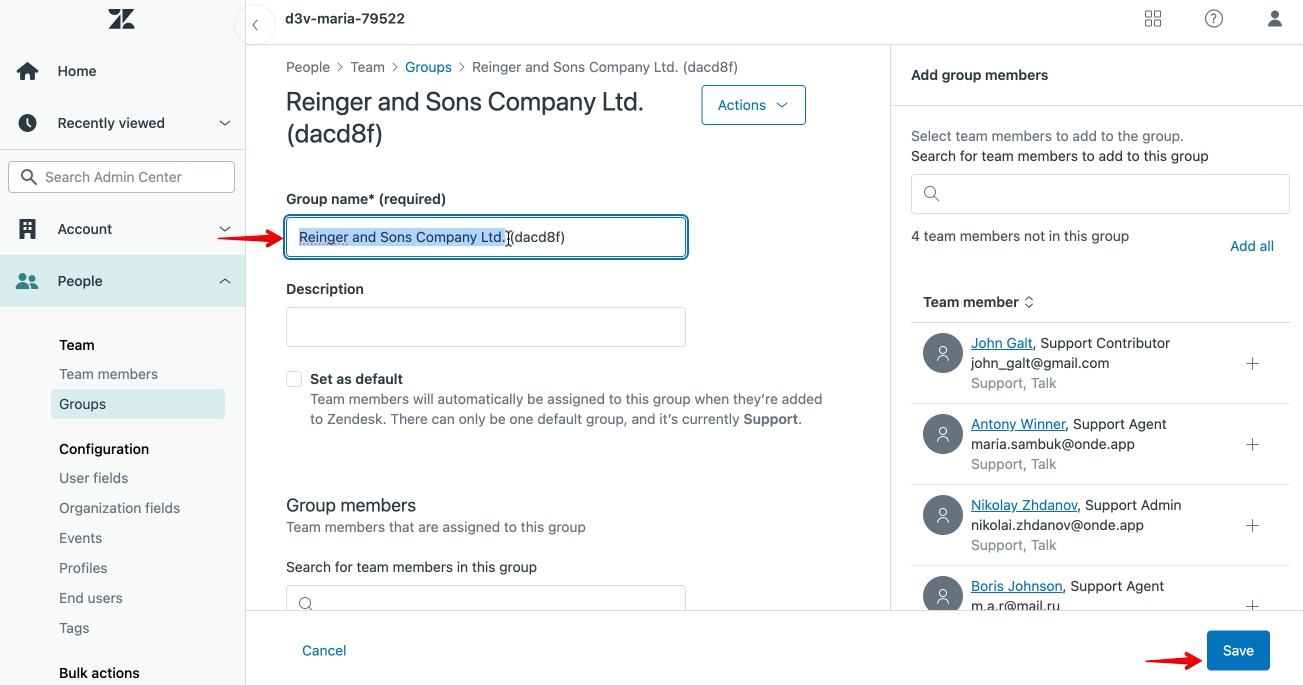
If you rename a company panel in My hub, the new name is not auto-updated in Zendesk, but you can manually update it from Zendesk. Tap on the Group you need and change the name.
By default account owner is the only group member and has Admin access to all the Groups.
The account owner can add other members to a group with different access rights and permissions.
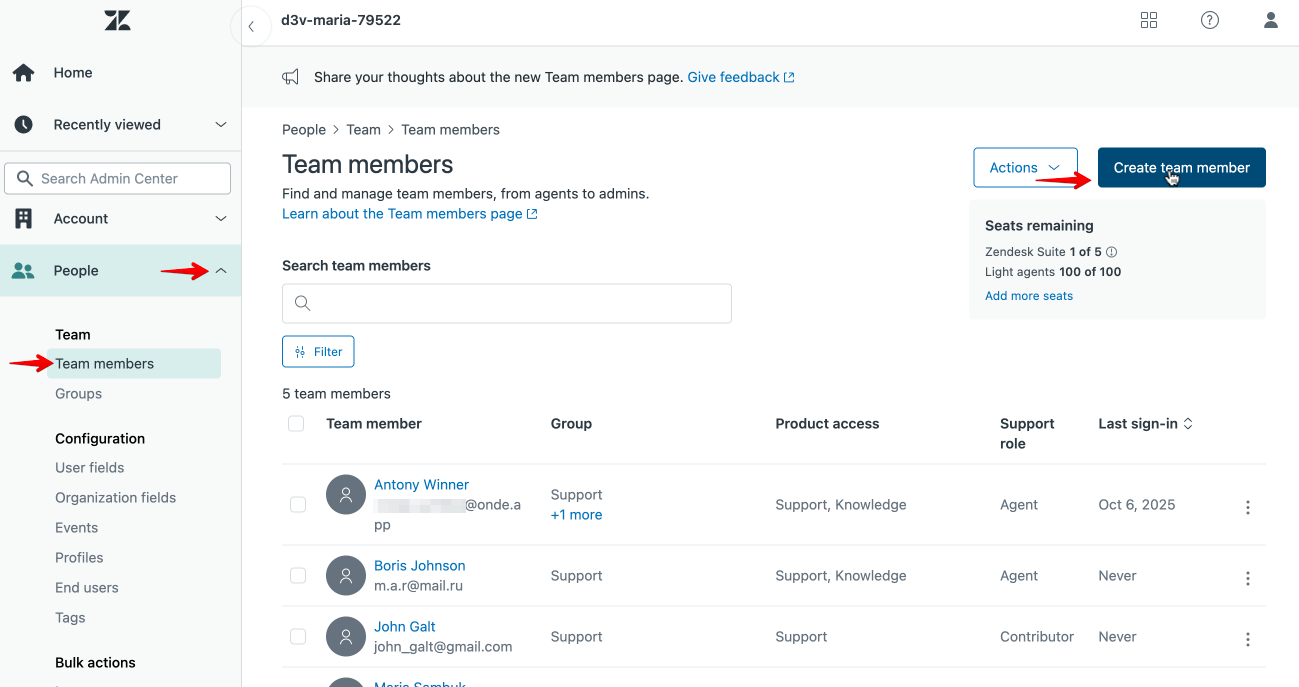
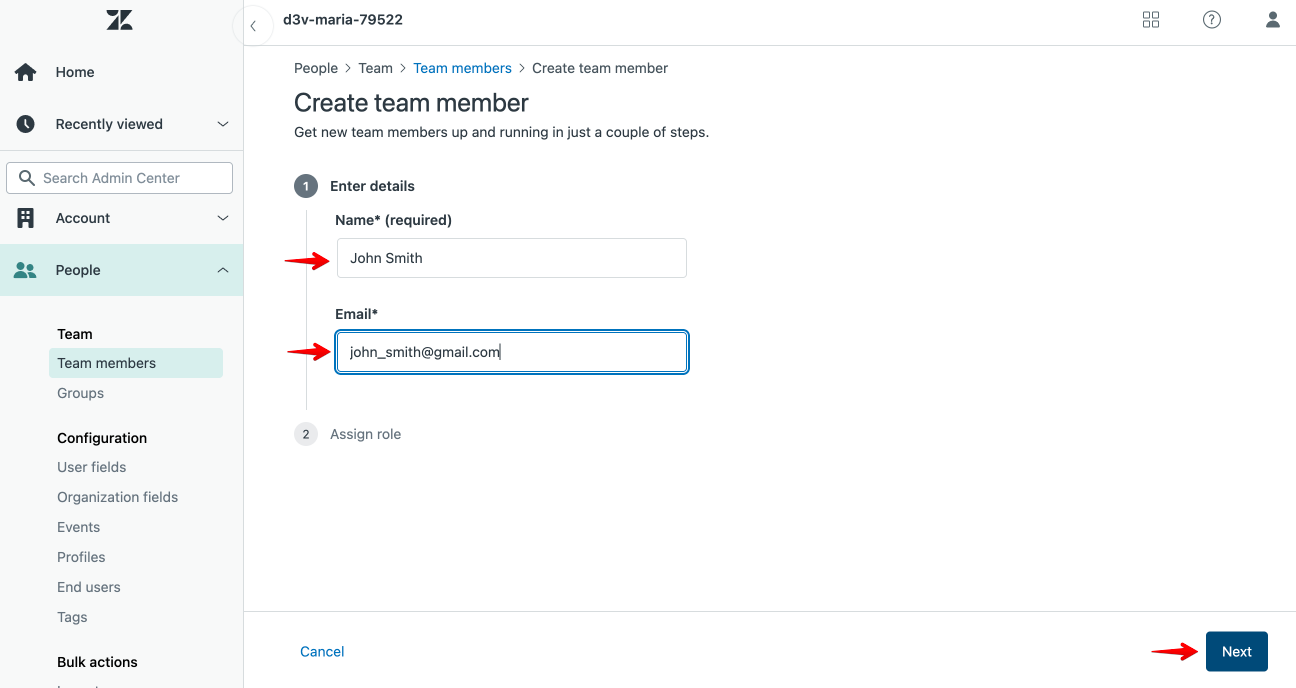
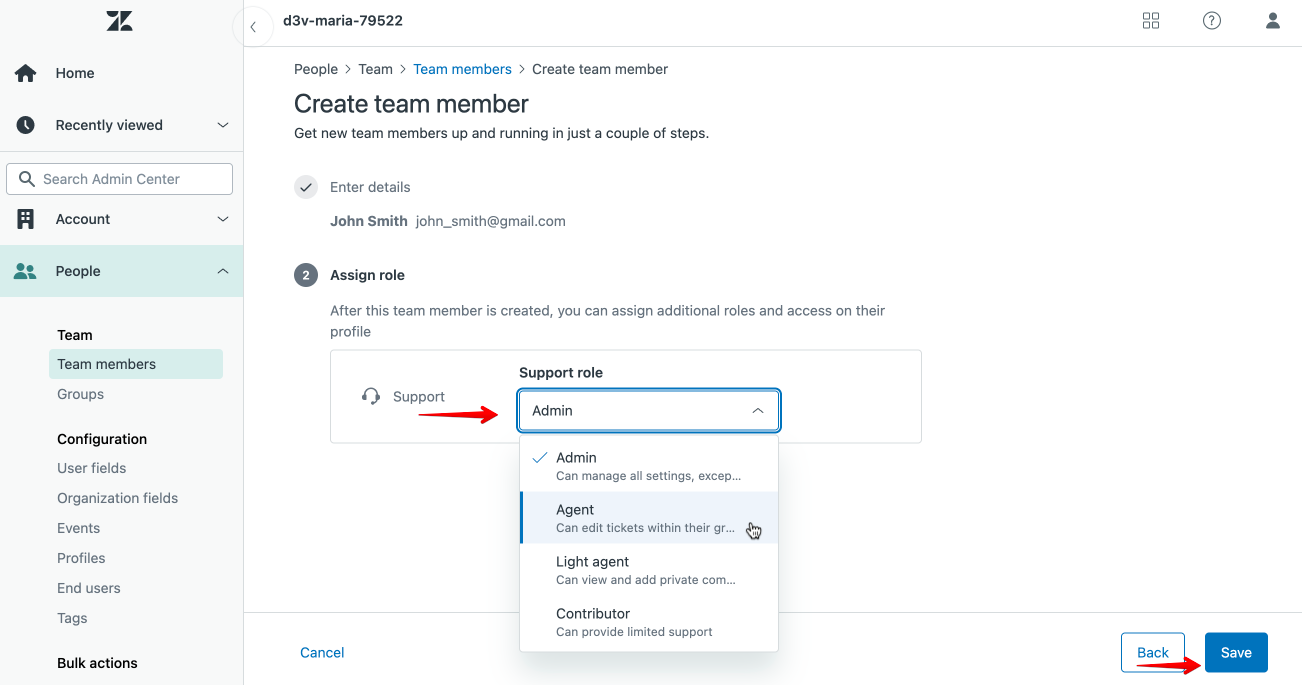
To add a new team member to the Zendesk account, proceed to Settings > People > Team members > Create team member and select the access role the new Team member will have.
To add a new Team member to a Group, access the group, review the Team members added to the Zendesk account and tap “+” to add the specific user to the Group.
For details on adding and managing new Team members, consult Zendesk guides About the Team members page and Adding agents and admins and setting ticket access
or contact Zendesk support from your account.
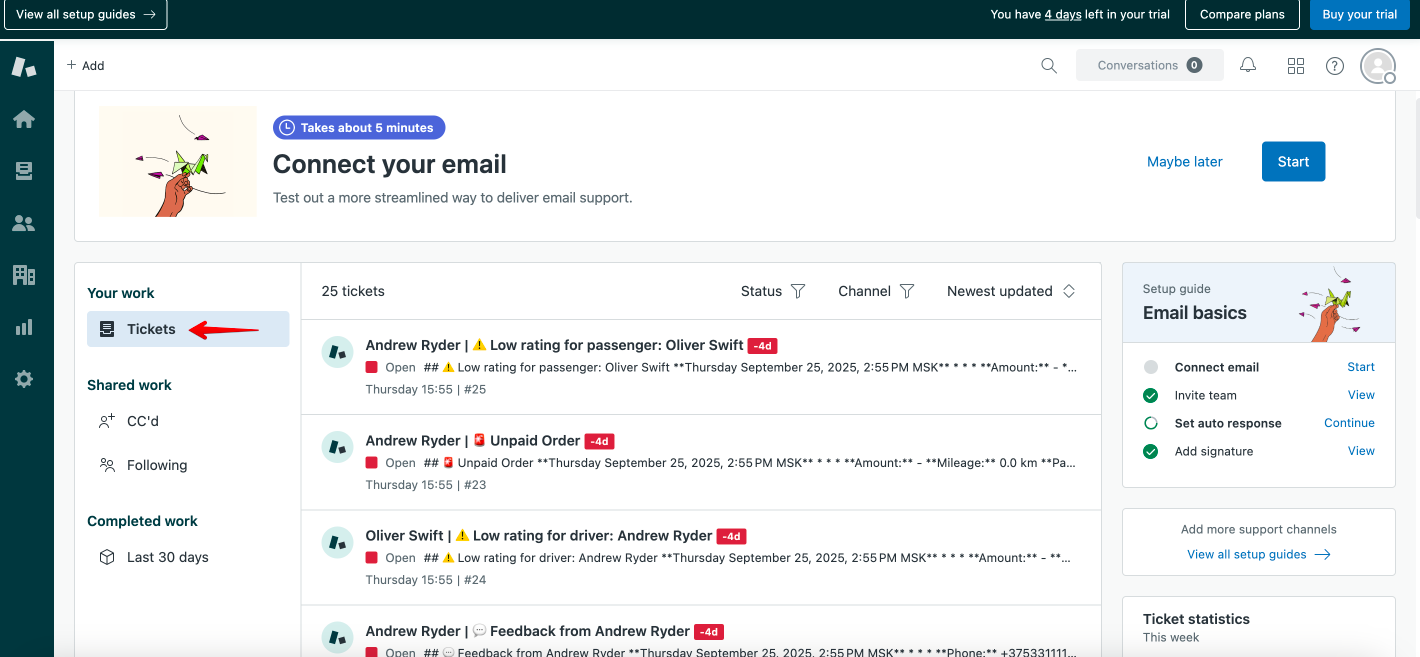
To review all the incoming Tickets, tap on the “Zendesk products" icon in the top right corner of your account and select “Support”.

You will be transferred to a page with all the incoming tickets.
The tickets are arranged chronologically, with recent at the top of the list.
To manage your Tickets, check the guides Creating views to build customized lists of tickets and Searching tickets or contact Zendesk support from your account.
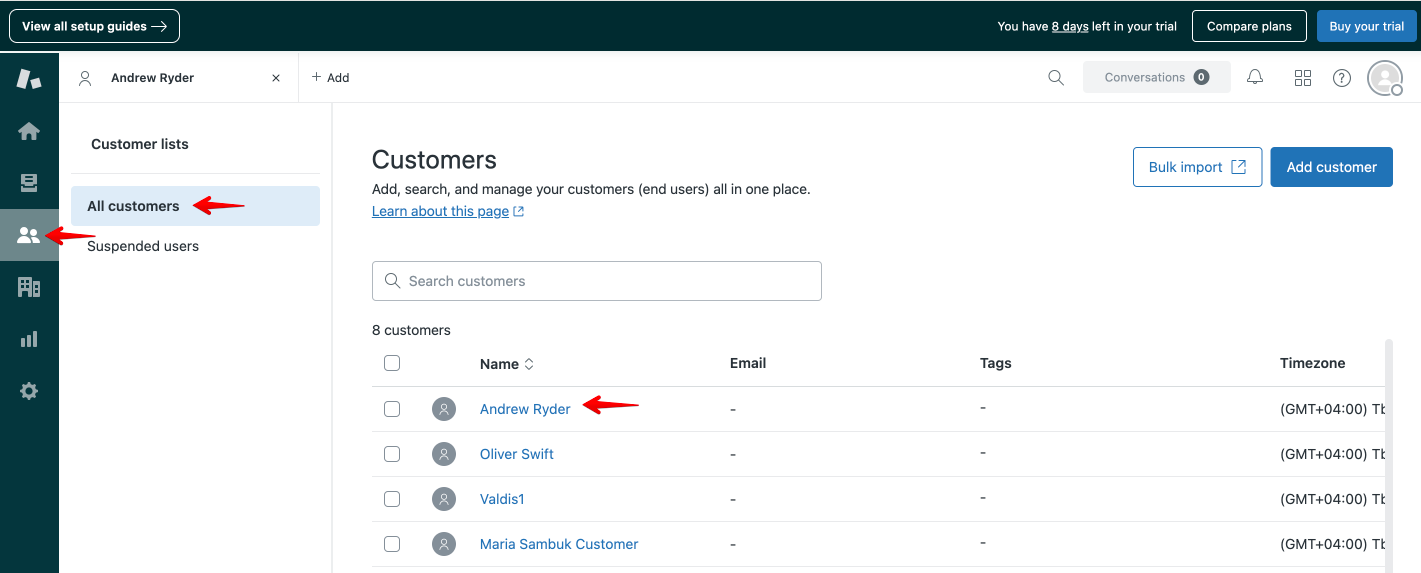
You can also check all the tickets created by a specific user.
To access all user profiles, proceed to “People” icon > All customers.
The name of a user’s profile corresponds to the name of a user's app profile.
For drivers, a work profile name is logged, so that one could easily cross-match it with the driver’s name in the My hub profile record.
Column “email” does not log any data and is always empty.
To access all tickets created by a user, tap on the name of the user whose tickets you need to check.
You can track the phone number of the user in the “Phone” field of the user’s record.
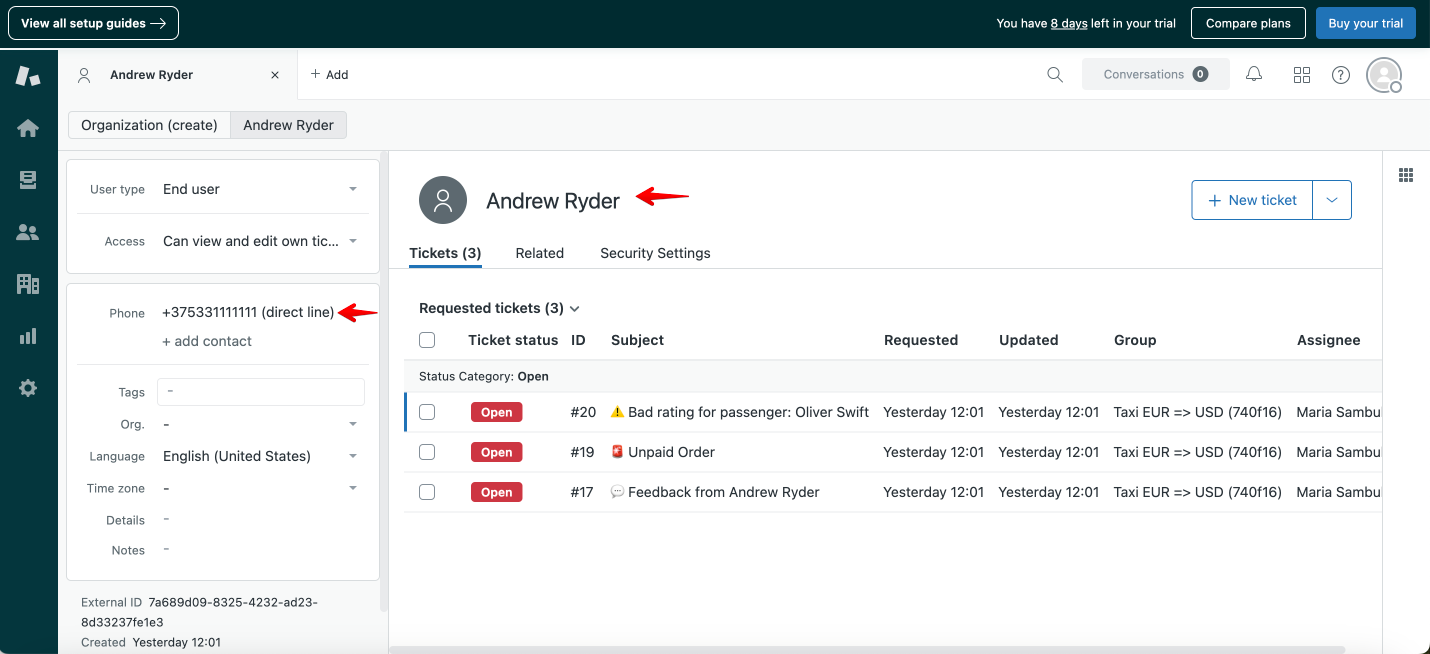
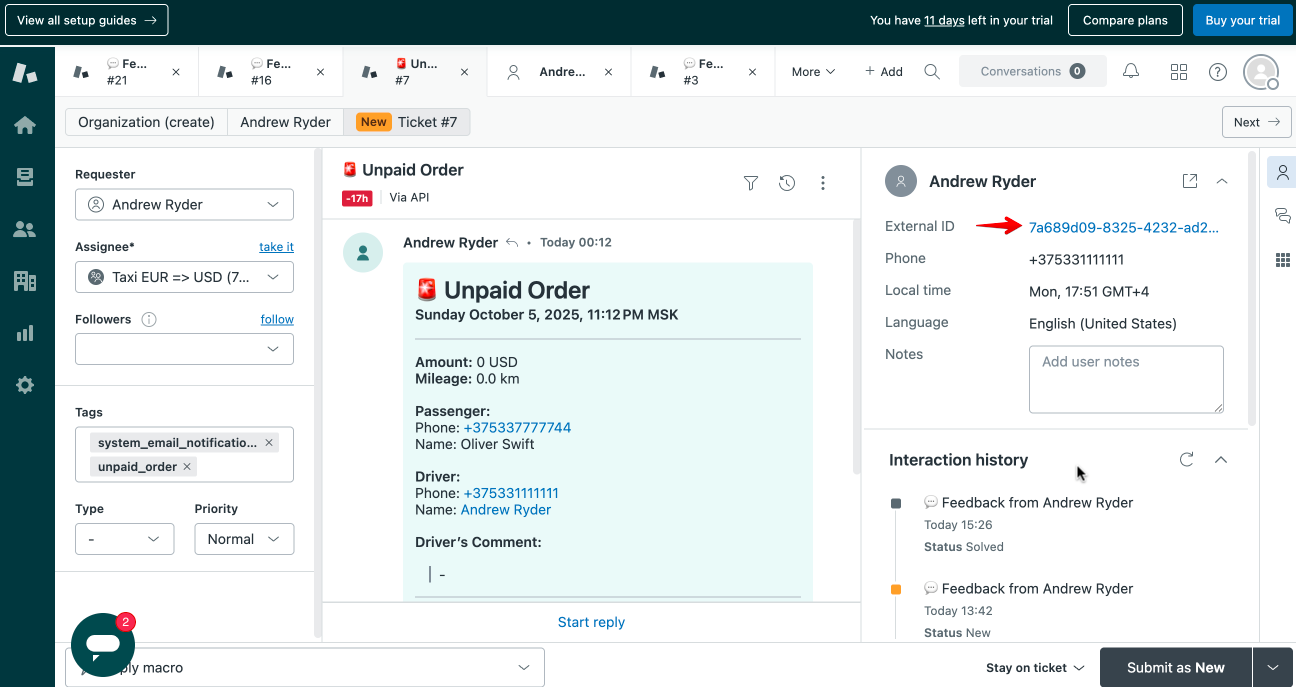
All the tickets are registered by the Requester.
The following events can be reported by a driver and registered in his profile:
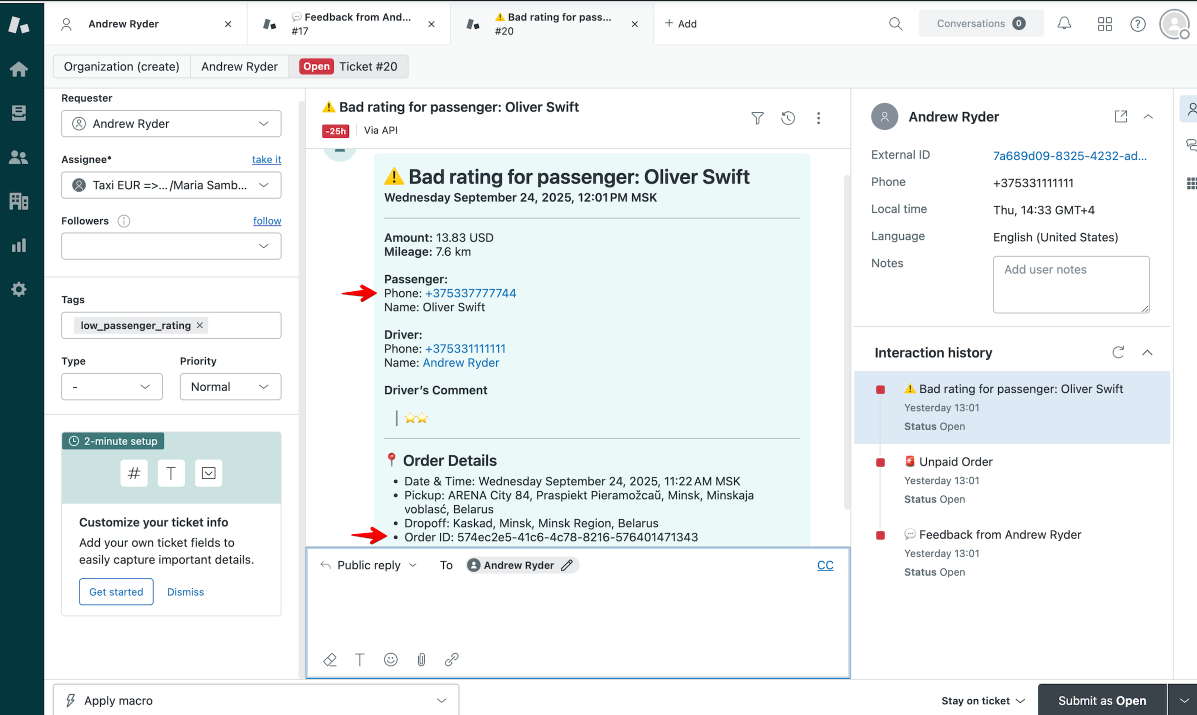
1. Bad rating for passenger (order ID is logged in the ticket)
2. Unpaid order feedback, reported for cash/terminal orders (order ID is logged in the ticket)
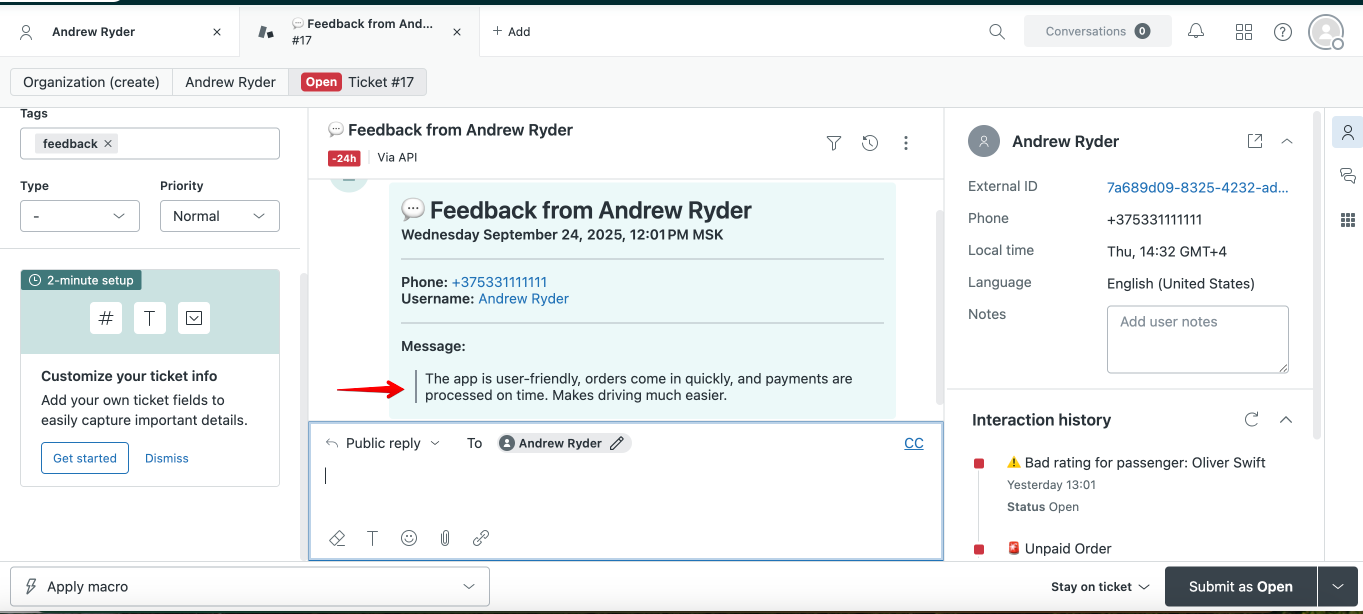
3. Driver app feedback (from the side menu of the App)
The following events can be reported by a customer and registered in his profile:
1. Bad rating for driver (reported at the end of an order)
2. Customer app feedback (from the side menu of the App)
(Tickets are similar to those created by drivers for "Bad rating for passenger” and “Driver app feedback”)
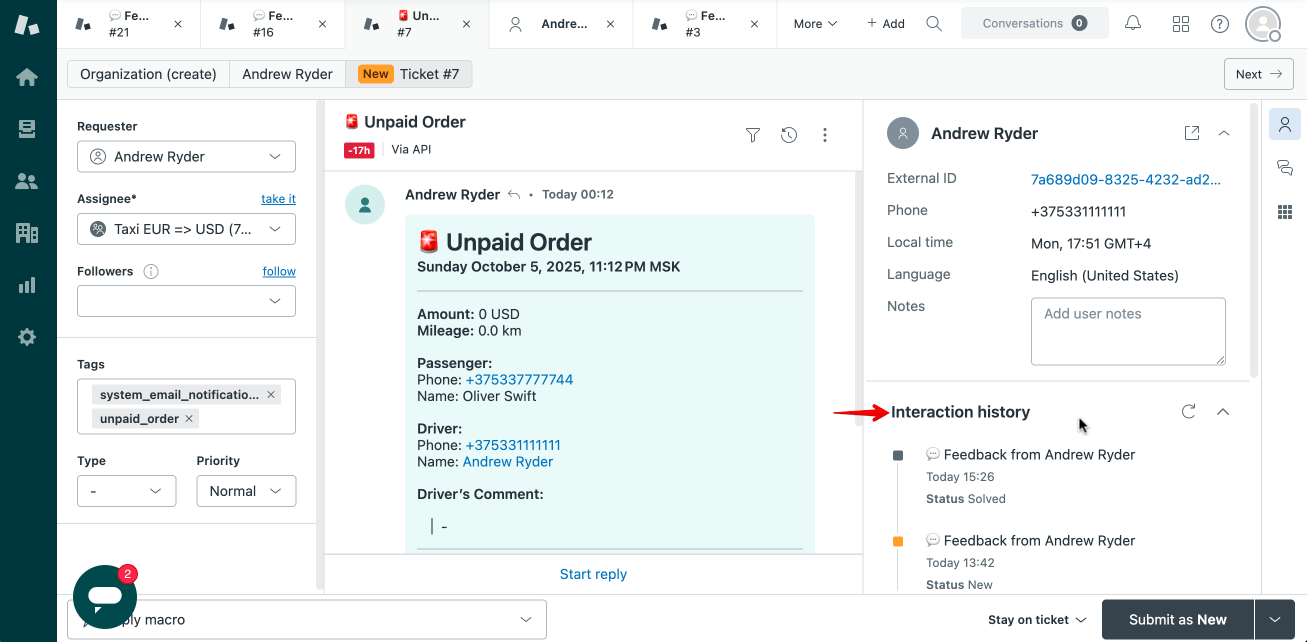
In every ticket, a Team member can check all the interaction history with the user, i.e. all the tickets submitted by the user.
IMPORTANT:
External ID in Zendesk ticket created by a user corresponds to Onde internal user Profile ID, which can be tracked in the Driver/Clients report.
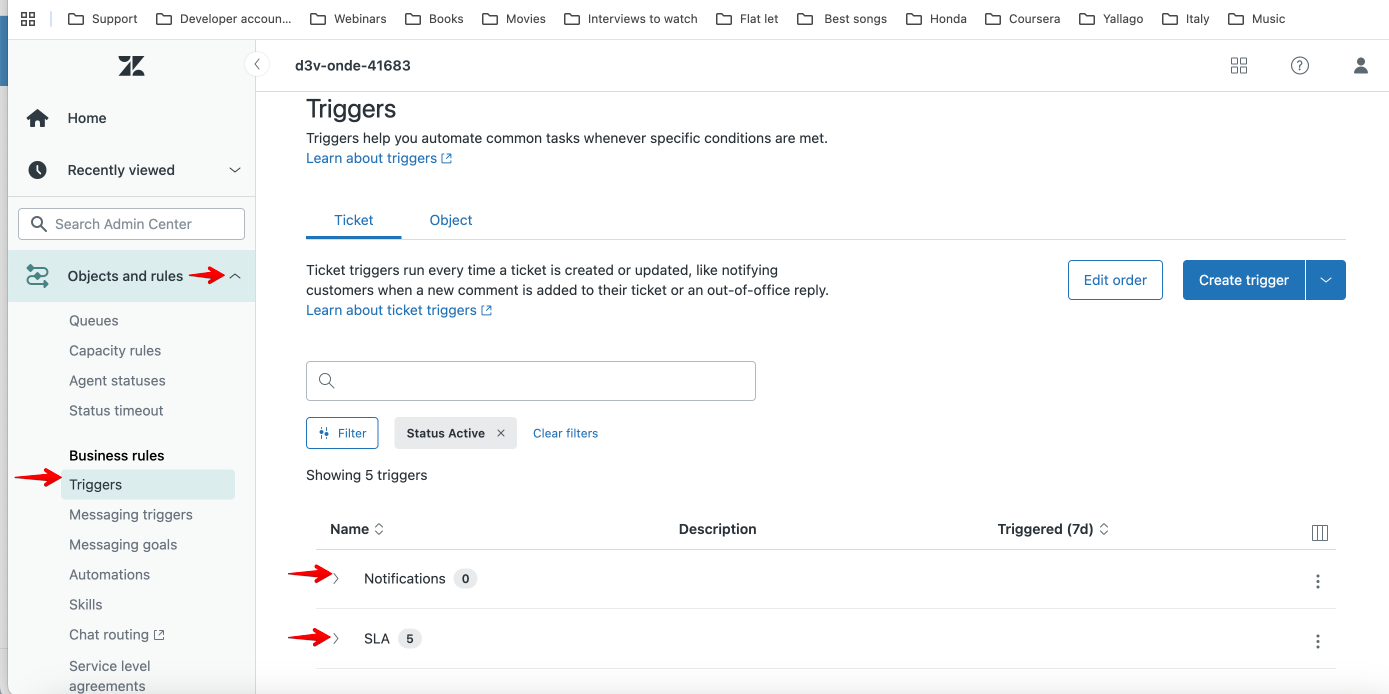
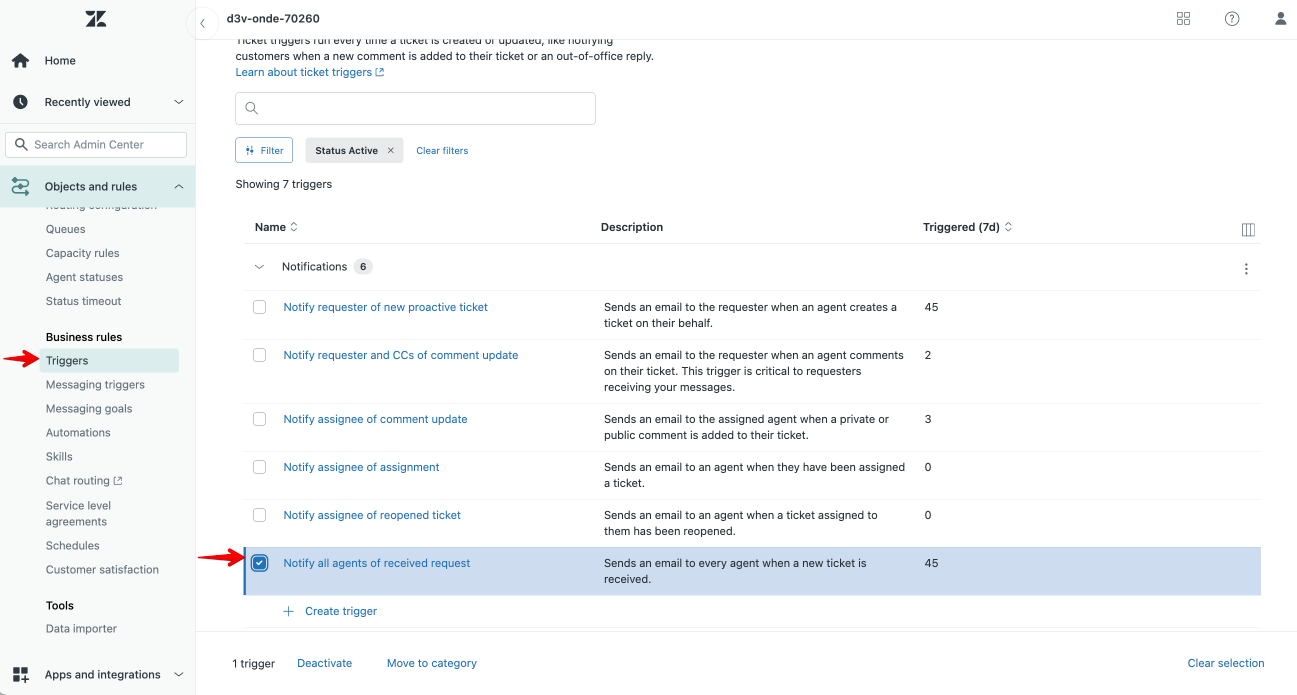
All Zendesk account members get Notifications to their email on any new ticket registered in Zendesk.
To switch the Notifications off and on, proceed to Settings > Objects and rules > Business rules > Triggers > Notifications/SLA > disable/enable checkbox “Notify all agents of received requests”.
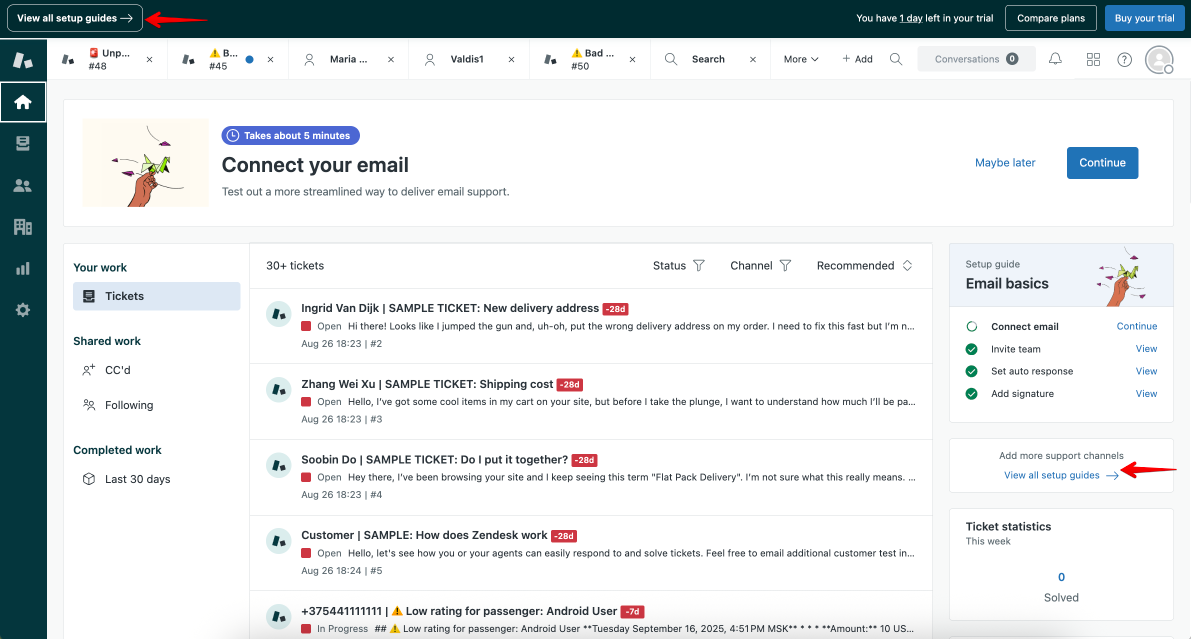
To help you better set up your Zendesk account space, check the instructions in “View all set-up guides” or review Zendesk video guides.
IMPORTANT:
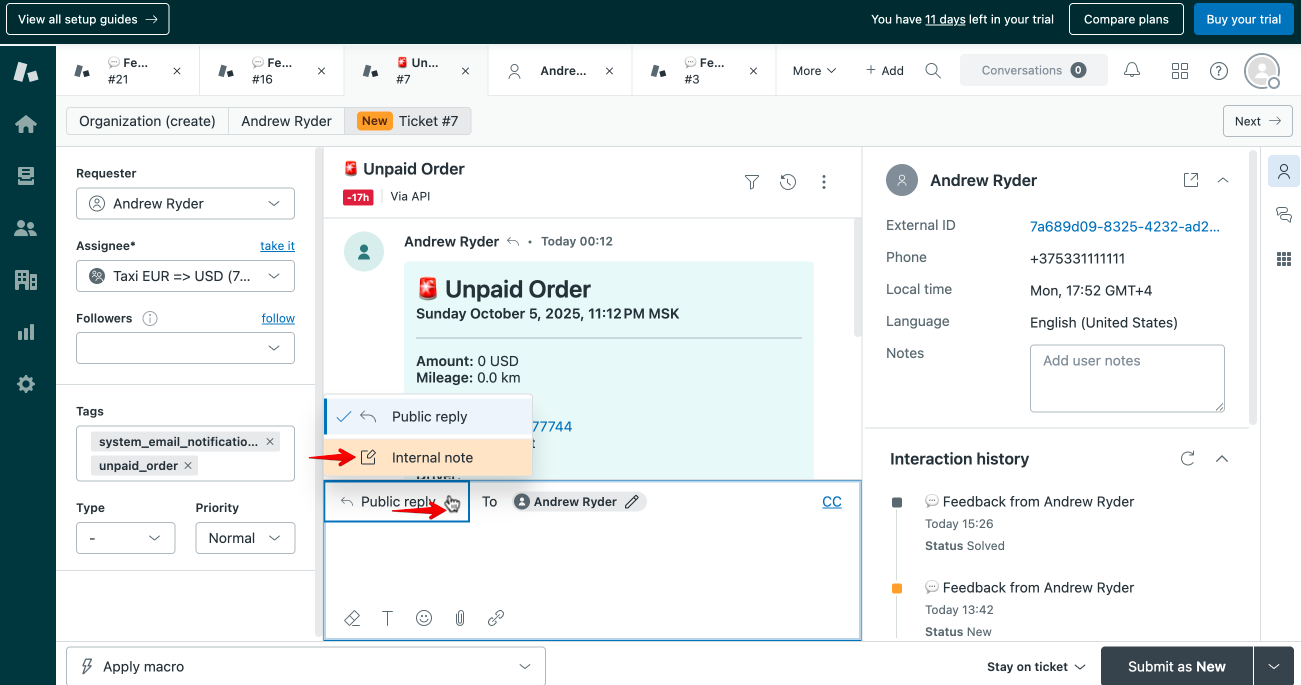
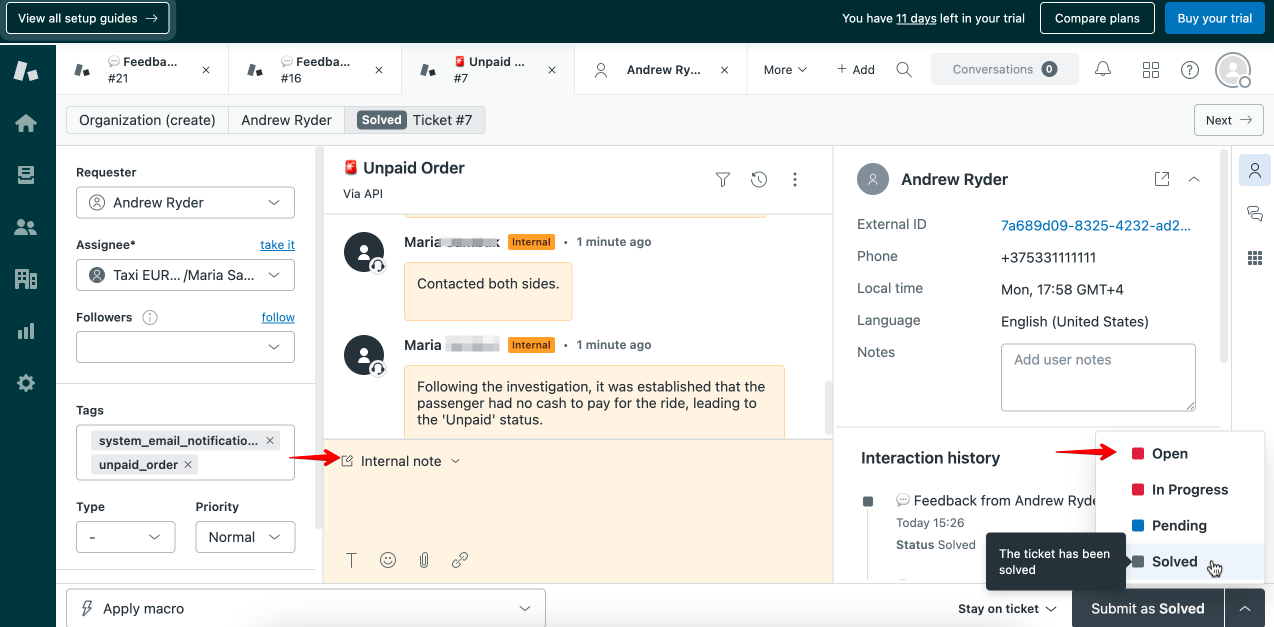
Zendesk integration registers user feedback and allows account members to review and manage it inside Zendesk. Team members have to contact the users outside Zendesk.
Team members can manage tickets inside Zendesk by adding internal notes and changing ticket statuses.
We hope that Zendesk ticket management will help you handle your user feedback efficiently!